
Lift System Parts
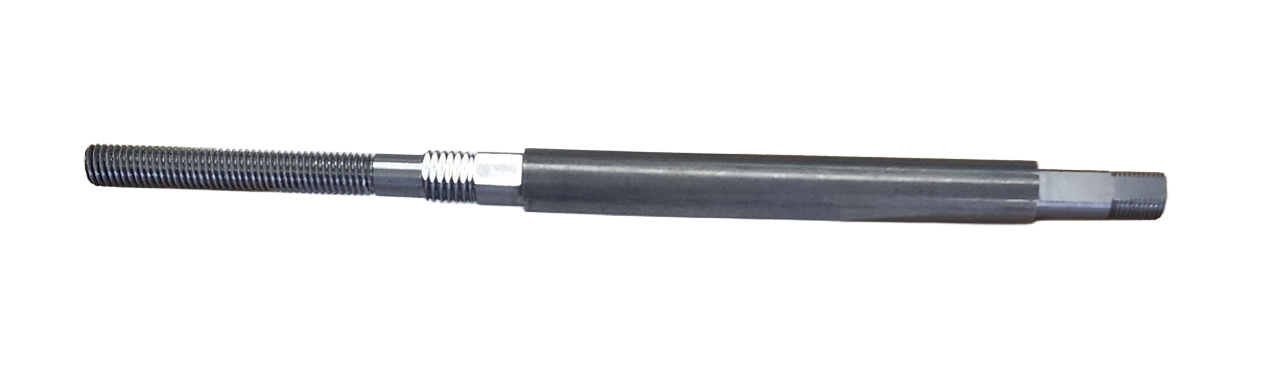
Main Winch Shaft for Starcraft Lift Systems (1983 – 1999)
SKU: PA-GOSHSTSHAFT
$112.35
Part details
The Main Winch Shaft for Starcraft campers (1983–1999) is a critical component of the rear-mounted lift system. This shaft acts as the primary drive link between your crank handle and the winch’s internal gear assembly, providing the necessary torque to pull the multiple lift cables and raise the camper roof.
Over years of use, this shaft is subjected to high stress and can become bent, rusted, or sheared at the pin points. If your crank handle feels "spongy," slips, or fails to engage the winch gears at all, a compromised main shaft is often the culprit. Replacing it with this heavy-duty, precision-machined shaft restores a solid connection and ensures your roof lifts safely and reliably.
Product Features & Specifications
- Vehicle Compatibility: Fits Starcraft pop-up campers manufactured between 1983 and 1999 equipped with the rear-mounted winch system.
- Precision Machined: Engineered to match the original factory specifications for a direct, drop-in fit.
- Heavy-Duty Steel: Built to withstand the significant rotational forces required to lift the camper roof.
- Direct Replacement: The essential fix for bent, twisted, or stripped winch drive shafts.
- Sold Individually: Price is for one (1) main winch shaft.
Identification Tip: This part is designed specifically for the Starcraft-proprietary rear winch used during the 80s and 90s. Before ordering, verify that your winch is mounted at the rear of the camper and that your crank handle inserts into a central drive shaft in the winch housing.
Installation: Replacing a Winch Cable (1983–2000 System)
Safety: Release the dolly-wheel jack clamp and lower the camper front to gain clearance at the back before starting.
- Era check: this procedure is for the 1983–2000 system — a winch with FOUR cables and turnbuckles. If your Starcraft has a tongue-mounted winch with ONE cable to a 4-way yoke, use the 1982-and-older guide instead.
- Backwind the winch until all tension is removed and no cable is wrapped on the drum.
- Loosen the drive-shaft retaining collar set screw and slide the shaft left until it clears the main-beam bushing (file off any burr).
- Remove the two rear winch-plate bolts to drop the plate for access (remove the front bolts too if needed).
- Remove the set screw holding the ball end of the old cable in the drum; disconnect the turnbuckle and eyebolt without twisting the cables; thread the old cable out.
- Thread the new cable in place and fasten the ball end in the drum with the allen set screw — use 242 Loc-Tite and leave 1/16" of thread showing outside the drum.
- Refasten the winch plate (torque the four bolts to 11 ft/lbs); slide the shaft over until the gears mesh, leaving 1/32" of end play; lock the retaining collar.
- Screw the eyebolt into the turnbuckle until 2–3 threads show on the inside. Do not twist or cross the cables. Do not tighten the jamb nut yet.
- Adjust the roof height following the Winch section of the guide, then tighten the jamb nuts.
Full guide with diagrams, maintenance tips, and troubleshooting: Starcraft 1985–2000 Guide.
Listed fitments (1)
Check your model, lift system and cable position against these listings and the part details.