
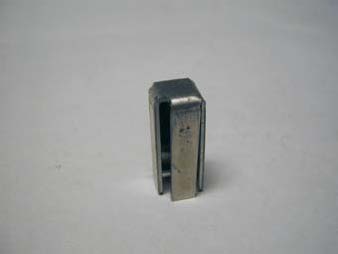
Lift System Parts
Jayco Drive Slug 3/4
SKU: PA-JAYC0012372
$6.83
Part details
3/4" Drive Slug for Jayco L&W Lift Systems
This is a replacement 3/4-inch Drive Slug for the L&W lift system used in Jayco pop-up campers. The drive slug is a critical component that connects the end of the 3/32" lift cable to the flexible pusher spring. It is the part that transfers the pulling force from the cable into a pushing force on the spring, which is what ultimately raises the corner of the roof.
According to the L&W repair manual, a common procedure involves removing the drive slug from the cable during a cable replacement. A broken or worn-out slug can cause the cable to become detached from the spring, resulting in a complete failure of that corner to lift.
Product Details:
- Function: Connects the lift cable to the pusher spring, transferring the lifting force.
- Size: 3/4 Inch
- Compatibility: For Jayco campers using the L&W lift system.
- Sold Individually.
Installation Note: The L&W repair manual provides specific instructions for replacing the drive slug, noting that when it is placed back into the spring track, the wide slot must be oriented correctly relative to the track's pulley.
Installation: Replacing a Drive Slug
Safety: Prop the roof with solid supports before servicing. After any repair, raise and lower the roof several times and confirm the door seats properly.
- Raise the roof and brace it securely.
- Crank the winch down 4–5 turns.
- Remove the lift arm and the spring (procedures in the guide).
- Pull the cable out of the spring track.
- Remove the drive slug from the cable and place the new drive slug on the cable.
- Place the new drive slug back into the spring track: the wide slot goes in the corner with the track pulley. If the track has no pulley, turn the wide slot toward the lower front corner of the spring track.
- Reverse the previous steps and adjust the final roof height.
Full guide with diagrams, maintenance tips, and troubleshooting: L&W Lift System Guide.
Listed fitments (1)
Check your model, lift system and cable position against these listings and the part details.